
![[picture of mechanic]](../gx/adam/mechanic.png)
[ ** This edition is dedicated to a very dear friend of mine called Natalie Wakelin, who I am indebted to for helping me recently. She has been an absolute star and true friend to me, and although she may not understand a word this "technical" document may have to offer -- I dedicate it to her all the same. Thanks Natalie!! :-) ** ]
Yes, yes, I know. You can stop clapping and applauding. I'm back :-) Seriously, I can only apologise for the "holiday" that the LWM has taken over the past "couple" of months. I have taken rather a large leap into the world of freedom and University life, and I found it more difficult to adjust to than I had originally anticipated!!
But that is by the by.....
For the keen eyed among you, the quote at the top of this column rather sums up the userability of Linux overall. Indeed, no matter how strange a problem may appear to be within Linux, it is not beyong the realm of possibility that it cannot be solved by using Linux. I have been finding that out for myself quite a lot recently :-)
Aside from all the University work, I have been actively helping out with problems at the Hants LUG, both in person and via their mailing list. Actually it has been quite exciting. I have also learn a lot!!
Well that is enough preamble for one month. Enjoy this issue, won't you?
Those of you who read the September edition will remember that I wrote an article about the use of Apache. I had some nice feedback on that (thanks to all who sent their comments). I thought it a nice idea to do a tutorial on squid.
For those of you who don't know, Squid (other than being a sea creature) is a Linux internet proxy program. Why is it called squid? Apparently because (quote: "all the good names were taken")
Squid, works by channelling internet requests through a machine (called a proxy server).
Furthermore, squid offers the ability to filter certain webpages, to either allow or disallow viewing. The ability to do this is through ACLs (Access Control Lists). More on these later.
Installing squid should be straight forward enough. Squid is supplied with all major distributions (RedHat, SuSE, Caldera, Debian, etc) so it should be easily accessible from your distribition CD's.
For those of you that have a Linux distribution that supports the RPM format, you can check to see if you already have it installed, by using the following command:
rpm -qa | grep -i squid
If it is installed, then you should find that "squid2-2.2.STABLE5-190" (or similar) is returned. If you get no responce then install squid from your distibution CD.
If squid is not on your distribution CD, or you are using a version of Linux (such as Debian and Slackware) that does not support the RPM format, then download the source in .tgz (tar.gz) format from http://www.squid-cache.org/download.
To install Squid from its sources copy the tar ball to "/tmp" and then issue the following commands:
1. If you are not user "root", su, or log in as root
2. cd /tmp
3. tar xzvf ./name_of_squid.tar.gz -- [or possibly .tgz]
4. Now run:

./configure

5. After which, you should have no errors. Then you can simply type:

make && make install

to compile and install the files.
Typically. from a standard RPM installation, these directories will be used:
/usr/bin
/etc
/etc/squid (possibly -- used to be under RH 5.0)
/var/squid/log/
[/usr/local/etc] <-- perhaps symlinked to "/etc"
If you're compiling it from source, then a lot of the files will end up in:
/etc
/etc/squid (possibly -- used to be under RH 5.0)
/usr/local/bin
/var
[/usr/local/etc] <-- perhaps symlinked to "/etc"
Suffice to say, it does not really matter, but unless you specifically have requested otherwise, this is where the files will end up.
Now that you have squid installed, let us move onto the next section.... configuration
So, you've installed squid, and are wondering...."Is that it?" ha -- if only it were true, gentle reader. Nope....there are lots of things still to do before we can have ourselves a good old proxy server.
Our efforts now shall be concentrated on one file /etc/squid.conf. It is this file which holds all the settings for squid. Because we will be editing this file, I always find it a good idea, to keep a copy of the original file. So, I think it would be a good idea, if you all issued the command:
cp /etc/squid.conf /etc/squid.conf.orig
And then fire up your favourite editor, and lets begin editing squid.conf
Actually trying to use this file to run squid "out of the box" is impossible. There are a number of things that you'll have to configure before you can have an up-and-running proxy server. At first glance, this file is about a mile long, but the developers have been helpful, since the majority of the file consists of comments about each option that is available.
The first thing, is to tell squid the IP address of the machine it is operating on and at which port it is to listen to. In squid.conf, you should find a commented line which looks like:
#http_port 3128
Uncomment this line, by deleting the leading hash (#) symbol. Now by default, the port number 3128 is chosen. However, should you wish to tell squid to listen on a different port, then change it!! Thus on my proxy machine, I have specified:
http_port 10.1.100.1:8080
Which binds squid to listen on the above IP address with the port 8080. What you have to be careful of, is making sure that no other running application is trying to use the same port (such as apache), which is a very common mistake that a lot of people make.
Now, as we progress through this configuration file, the next major configuration option we should now change is cache_mem. This option tells squid how much memory it should use for things like caching.
I have just uncommented this line -- and left the default at 8 MB
Further on down from this option are some more options which tell squid about the high/low cache "watermark". This is simply a percentage of disk-space, that says that when it gets to within 90/95% then squid should start deleting some of its cached items.
#cache_swap_low  90
#cache_swap_high 95
I have simply uncommented these, but I have changed their values. The reason being, is because I have a 60 GB hard drive, one percent is hundreds of mega bytes, so I have changed the values to:
cache_swap_low  97
cache_swap_high 98
Right....so far so good. We have told squid on which IP and port to listen to, told it how much memory it should use, and told it the percentage of drive space it should reach before it starts deleting its own cached items. Great!! If you haven't do so already, save the file.
The next and penultimate option that I changed was quite an important one, since this one determines the location and size of the cache directories. There is a TAG, which looks like:
cache_dir /var/squid/cache 100 16 256
What this says is that for the path "/var/squid/cache"each top-level directory will hold 100MB. There will be 16 top-level directories and below that there will be 256 sub-directories
The last major item that I shall be tweaking in this file, before moving on to filtering, is the use of access logs. Just below the option we have just configured for the cache_dir, are options to allow logging. Typically you have the option of logging the following:
Each of the above logs have their own advantage / disadvantage in the running of your proxy server. Typically, the only logs that I keep are the access logs and the cache log. The reason being simply because the store and swap logs don't interest me :-).
It is the access log file which logs all the requests that users make (i.e. to which website a particular user is going to). While I was at school, this file was invaluable in determining which user was trying to get to banned sites. I recommend all sysadmins that have or are going to set-up an internet proxy server to enable this feature -- it is very useful.
So, I did the following (uncommenting the TAGS):
cache_access_log /var/squid/logs/access.log
cache_log /var/squid/logs/cache.log
I recommend that you leave the log names as they are.
Obviously, I have only covered the most basic options within the squid.conf file. There are a whole mass of options for particular situations. Each option is fairly well commented, so should you wish to see what a particular option does, it should not be too hard.
This section is still using "/etc/squid.conf" but I shall go into the configuration options for access control in a little more detail.
Access control gives the sysadmin a way of controlling which clients can actually connect to the proxy server, be it via an IP address, or port, etc. This can be useful for computers that are in a large network configuration.
Typically ACL's (Access Control Lists) can have the following properties to them:
All access controls have the following format to them:
acl acl_config_name type_of_acl_config values_passed_to_acl
Thus in the configuration file, locate the line:
http_access deny all
And above which, add the following lines
acl weekendmechnetwork 10.1.100.1/255.255.255.0
http_access allow weekendmechnetwork
You can change the acl name of "weekendmechnetwork" to a name of your choice. What this does, is it says that for the acl with the name "weekendmechnetwork", use the specified IP address 10.1.100.1 (the proxy server), with a netmask of 255.255.255.0 Thus, "weekendmechnetwork" is the name assigned to the clients on the network.
The line "http_access allow weekendmechnetwork" says that the rule is valid, and so can be parsed by squid itself.
The next thing that we shall do, is look at allowing selected clients to access the internet. This is useful for networks where not all of the machines should connect to the internet.
Below what we have already added, we can specify something like:
acl valid_clients src 192.168.1.2 192.168.1.3 192.168.1.4
http_access allow valid_clients
http_access deny !valid_clients
What this says is that for the ACL name "valid_clients" with the src IP addresses listed, allow http access to "valid_clients" (http_access allow valid_clients), and disallow anyother IP's which are not listed (http_access deny !valid_clients).
If you wanted to allow every machine Internet access, then you can specify:
http_access allow all
But, we can extend the ACL's further, by telling squid that certain ACL's are only active at certain times, for example:
1.   acl clientA src 192.168.1.1
2.   acl clientB src 192.168.1.2
3.   acl clientC src 192.168.1.3
4.   acl morning time 08:00-12:00
5.   acl lunch time 12:30-13:30
6.   acl evening time 15:00-21:00
7.   http_access allow clientA morning
8.   http_access allow clientB evening
9.   http_access allow clientA lunch
10.  http_access allow clientC evening
11.  http_access deny all
[ ** N.B. Omit the line numbers when entering the above, I've added them here to make explaination easier -- Thomas Adam ** ]
Lines 1-3 set-up the ACL names which identify the machines.
Lines 4-6 set-up ACL names for the specified time limits (24-hour format).
Line 7 says to allow clientA (and only clientA) access during "morning"
hours.
Line 8 says to allow clientB (and only clientB) access during "evening"
hours.
Line 9 says to allow clientA (and only clientA) access during "lunch"
hours.
Line 10 says to allow clientC (and only clientC) access during "evening"
hours.
Line 11 then says that if any other client attempts to connect -- disallow it.
But we can also take the uses of ACL's further, by telling Squid to match certain regexes in the URL expression, and in effect throw the request in the bin (or more accurately -- "&>/dev/null" :-)
To do this, we can specify a new ACL name that will hold a particular pattern. For example
1.  acl naughty_sites url_regex -i sex
2.  http_access deny naughty_sites
3.  http_access allow valid_clients
4.  http-access deny all
[ ** Remember -- don't use the line numbers above!! ** ]
Line 1 says that the word "sex" is associated with the ACL name "
naughty_sites" the clause url_regex says that the ACL is of that type -- i.e.
it is to check the words contained within the URL. The -i says that it is to
ignore case-sensitivity.
Line 2 says to deny all clients access to the website that contains anything from
the ACL "naughty_sites"
Line 3 says to allow access from "valid_clients".
Line 4 says to deny any other requests.
So,I suppose you are now wondering...."how do I specify more than one regex?". Well, the answer is simple....you can put them in a separate file. For example, suppose you wanted to filter the following words, and dis-allow access to them, if they appeared in the URL:
sex
porn
teen
You can add them to a file (one word at a time), say in:
/etc/squid/bad_words.regex
Then, in "/etc/squid.conf" you can specify:
acl bad-sites url_regex -i "/etc/squid/bad_words.regex"
http_access deny bad_sites
http_access allow valid_clients
http-access deny all
Which probably makes life easier!! :-). That means that you can add words to the list whenever you need to.
There is also a much more easier way of filtering both regexes and domain names, by using a program called SquidGuard. More about that later.....
Now we come to the most important part -- actully running squid. Unfortunately, if this is the first ever time that you'll be initialising squid, then there are a few options that you must pass to it.
Typically, the most common options that can be passed to squid, can be summed up in the following table.
| Flag | Explanation |
|---|---|
| -z | This creates the swap directories that squid needs. This should only ever be used when running squid for the first time, or if your cache directories get deleted. |
| -f | This options allows you to specify an alternative file to use, rather than the default "/etc/squid/conf". However, this option should be rarily used. |
| -k reconfigure | This option tells squid to re-load its configuration file, without stopping the squid daemon itself. |
| -k rotate | This option tells squid to rotate its logs, and start new ones. This option is useful in a cron job. |
| -k shutdown | Stops the execution of Squid. |
| -k check | Checks to ensure that the squid deamon is up and running. |
| -k parse | Same as "-k reconfigure". |
The full listing however for the available options are as follows:
Usage: squid [-dhsvzCDFNRVYX] [-f config-file] [-[au] port] [-k signal]
       -a port   Specify HTTP port number (default: 3128).
       -d level  Write debugging to stderr also.
       -f file   Use given config-file instead of
                 /etc/squid/squid.conf
       -h        Print help message.
       -k reconfigure|rotate|shutdown|interrupt|kill|debug|check|parse
                 Parse configuration file, then send signal to
                 running copy (except -k parse) and exit.
       -s        Enable logging to syslog.
       -u port   Specify ICP port number (default: 3130), disable with 0.
       -v        Print version.
       -z        Create swap directories
       -C        Do not catch fatal signals.
       -D        Disable initial DNS tests.
       -F        Foreground fast store rebuild.
       -N        No daemon mode.
       -R        Do not set REUSEADDR on port.
       -V        Virtual host httpd-accelerator.
       -X        Force full debugging.
       -Y        Only return UDP_HIT or UDP_MISS_NOFETCH during fast reload.
If you are running squid for the first time, then log in as user "root" and type in the following:
squid -z
This will create the cache.
Then you can issue the command:
squid
And that's it -- you have yourself a running proxy server. Well done!!
SquidGuard is an external "redirect program" whereby squid actually forwards the requests sent to itself to the external SquidGuard daemon. SquidGuard's job is to allow a greater control of filtering than Squid itself does.
Although, it should be pointed out that to carry out filtering, the use of SquidGuard is not necessary for simple filters.
SquidGuard is available from (funnily enough) http://www.squidguard.org/download. This site is very informative and has lots of useful information about how to configure SquidGuard.
As per Squid, SquidGuard is available in both rpm and .tgz format.
If your distribution supports the RPM format then you can install it in the following way:
su - -c "rpm -i ./SquidGuard-1.2.1.noarch.rpm"
Should your distribution not support the RPM format, then you can download the sources and compile it, in the following manner:
tar xzvf ./SquidGuard-1.2.1.tgz
./configure
make && make install
The files should be installed in "/usr/local/squidguard/"
Before we can actually start tweaking the main "/etc/squidguard.conf", we must first make one small change to our old friend "/etc/squid.conf". In the file, locate the TAG:
#redirect_program none
Uncomment it, and replace the the word "none" for the path to the main SquidGuard file. If you don't know where the main file is, then you can issue the command:
whereis squidGuard
And then enter the appropriate path and filename. Thus, it should now look like:
redirect_program /usr/local/bin/squidGuard
Save the file, and then type in the following:
squid -k reconfigure
Which will re-load the configuration file.
Ok, now the fun begins. Having told squid that we will be using a redirect program to filter requests sent to it, we must now define rules to match that.
SquidGuard's main configuration file is "/etc/squidguard". Out of the box, this file looks like the following:
-------------------
logdir /var/squidGuard/logs
dbhome /var/squidGuard/db

src grownups {
    ip	   10.0.0.0/24	  # range 10.0.0.0  - 10.0.0.255
			  # AND
    user   foo bar	  # ident foo or bar
}

src kids {
    ip	   10.0.0.0/22	  # range 10.0.0.0 - 10.0.3.255
}

dest blacklist {
    domainlist blacklist/domains
    urllist    blacklist/urls
}

acl {
    grownups {
	pass all
    }

    kids {
	pass !blacklist all
    }

    default {
	pass none
	redirect http://localhost/cgi/blocked?clientaddr=%a&clientname=%n&clientuser=%i&clientgroup=%s&targetgroup=%t&url=%u
    }
}
-------------------
What I shall do, is take the config file in sections, and explain what each part of it does.
logdir /var/squidGuard/logs
dbhome /var/squidGuard/db
The first line sets up the directory where the logfile will appear, and creates it if it does not exist.
The second line sets up the directory where the database(s) of banned sites, expressions, etc, are stored.
src grownups {
    ip	   10.0.0.0/24	  # range 10.0.0.0  - 10.0.0.255
			  # AND
    user   foo bar	  # ident foo or bar
}
The above block of code, sets up a number of things. Firstly, the src "grownups" is defined by specifying an IP address range, and saying which users are a member of this block. For convenience sake, the generic terms "foo" and "bar" are used here as an example.
It should also be pointed out that the user TAG can only be used if an ident server is running on the server that forwards the request onto the squid proxy server, otherwise it will be void.
src kids {
    ip	   10.0.0.0/22	  # range 10.0.0.0 - 10.0.3.255
}
This section of statements sets up another block, this time called "kids" which is determined by a range of IP addresses, but no users.
You can think of grownups and kids as being ACL names similar to those found in "/etc/squid.conf".
dest blacklist {
    domainlist blacklist/domains
    urllist    blacklist/urls
    expression blacklist/expressions
}
This section of code is significant since it defines a dest list to specific filtering processes. By processes, there are three main ways that SquidGuard applies its filtering process:
1. domainlist -- lists domains, and only those, one line at a time, for example:
nasa.gov.org
squid-cache.org
cam.ac.uk
2. urllist -- actually specifying specific webpages (and omitting the "www.", e.g.
linuxgazette.com/current
cam.ac.uk/~users
3. expression -- regex words that should be banned within the URL, thus:
sex
busty
porn
The last block of code:-
acl {
    grownups {
	pass all
    }

    kids {
	pass !blacklist all
    }

    default {
	pass none
	redirect http://localhost/cgi/blocked?clientaddr=%a&clientname=%n&clientuser=%i&clientgroup=%s&targetgroup=%t&url=%u
    }
}
Says that for the acl block, and for the "grownups" section, pass all the requests to it -- i.e. allow those URL's / expressions, etc, that are contained witin the dest blacklists.
Then, it says that for the "kids" section, pass all requests, except those contained within the dest blacklists. At which point, if a URL is matched from the dest blacklists, it is then forwarded, to the default section.
The default section says that if requests are found not to come from either " grownups" or "kids" then it won't allow access to the website, and will redirect you to another webpage, which is most likely an error page.
The variables passed with this redirect statement, specify the type of request, etc, which can then be processed by a cgi-script to produce a custom error message, for example.
It should be pointed out that in order for filtering to take place, then the following piece of code should be present:
default {
  pass none
}
Either with or without the redirect clause.
There are more advanced configuration options that can be used within this file. Examples can be found out at http://www.squidguard.org/configuration.
Thus completes the tutorial for both Squid and SquidGuard. Further information can be found at the all of the URL's embedded in this document, and at my website, which is at the following address:
www.squidproxyapps.org.ukOK, ok, I know you're all thinking: "Not another backup script". Well, there has been some talk of this on TAG (The Answer Gang) mailing list recently so, I thought, I'd jump on the band-wagon.....
This script is really quite simple -- it uses a configuration file (plain text) which lists all of the files (and directories) that you want backed up, and then puts them in a gzipped tarball, in a specified location.
Those of you who are familiar with BASH shell scripting, might find this a little rumedial, however, I hope that my in-line comments will aid those who are still trying to learn the shell
-------------------
#!/bin/bash
#################################################
#Keyfiles - tar/gzip configuration files        #
#Version:   Version 1.0 (first draft)           #
#Ackn:      based on an idea from Dave Turnbull #
#Authour:   Thomas Adam				#
#Date:      Monday 28 May 2001, 16:05pm BST     #
#Website:   www.squidproxyapps.org.uk           #
#Contact:   thomas@squidproxyapps.org.uk        #
#################################################

#Comments herein are for the benefit of Dave Turnbull :-).

#Declare Variables
configfile="/etc/keyfiles.conf"
tmpdir="/tmp"
wrkdir="/var/log/keyfiles"
tarfile=keyfiles-$(date +%d%m%Y).tgz
method=$1           #options passed to "keyfiles"
submethod=$2        #options supplied along with "$1"
quiet=0       	    #Turns on verbosity (default)

cmd=`basename $0`   #strip path from filename.
optfiles="Usage: $cmd [--default (--quiet)] [--listconffiles] [--restore (--quiet)] [--editconf] [--delold] [--version]"
version="keyfiles: Created by Thomas Adam, Version 1.0 (Tuesday 5 June 2001, 23:42)"

#handle error checking...
if [ ! -e $configfile ]; then
  for beepthatbell in 1 2 3 4 5; do
    echo -en "\x07"
    mail -s "[Keyfiles]: $configfile not found" $USER
  done
fi

#Make sure we have a working directory
[ ! -d $wrkdir ] && mkdir $wrkdir

#Parse options sent via command-line
if [ -z $method ]; then
  echo $optfiles
  exit 0
fi

#Check command line syntax
check_syntax ()
{
  case $method in
    --default)
    cmd_default
    ;;
    --listconffiles)
    cmd_listconffiles
    ;;
    --restore)
    shift 1
    cmd_restore
    ;;
    --editconf)
    exec $EDITOR $configfile
    exit 0
    ;;
    --delold)
    cd $wrkdir && rm -f ./*.old > /dev/null
    exit 0
    ;;
    --version)
    echo $version
    exit 0
    ;;
    --*|-*|*)
    echo $optfiles
    exit 0
    ;;
  esac
}

#Now the work begins.....
#declare function to use "--default" settings
cmd_default ()
{

  #tar/gz all files contained within $configfile

  if [ $submethod ]; then
    tar -cZPpsf $tmp/$tarfile $(cat $configfile) &>/dev/null 2>&1
  else
    tar -vcZPpsf $tmp/$tarfile $(cat $configfile)
  fi

  #If the contents of the directory is empty......
  if test $(ls -1 $wrkdir | grep -c -) = "0"; then
    mv $tmp/$tarfile $wrkdir
    exit 0
  fi

  for i in $(ls $wrkdir/*.tgz); do
    mv $i $i.old
  done

  mv $tmp/$tarfile $wrkdir
}

#List files contained within $configfile
cmd_listconffiles ()
{
  sort -o $configfile $configfile
  cat $configfile
  exit 0
}

#Restore files......
cmd_restore ()
{
  cp $wrkdir/keyfiles*.tgz /
  cd /

  #Check for quiet flag :-)
  if [ $submethod ]; then
    tar vzxfmp keyfiles*.tgz &>/dev/null 2>&1
    rm -f /keyfiles*.tgz
    exit 0
  else
    tar vzxfmp keyfiles*.tgz
    rm -f /keyfiles*.tgz
    exit 0
  fi
}

#call the main function
check_syntax
-------------------
Suffice to say, the main changes that you might have to make, are to the following variables:
configfile="/etc/keyfiles.conf"
tmpdir="/tmp"
wrkdir="/var/log/keyfiles"
However, my script is sufficiently intelligent, to check for the presence of $wrkdir, and if it doesn't exist -- create it.
You will also have to make sure that you set the appropriate permissions, thus:
chmod 700 /usr/local/bin/keyfiles
The most important file, is the script's configuration file, which, for me, looks like the following:
-------------------
/etc/keyfiles.conf
/etc/rc.config
/home/*/.AnotherLevel/*
/home/*/.fvwm2rc.m4
/home/solent/ada/*
/root/.AnotherLevel/*
/root/.fvwm2rc.m4
/usr/bin/header.sed
/usr/bin/loop4mail
/var/spool/mail/*
-------------------
Since this file, is passed to the main tar program, then the use of wildcards is valid, as in the above file.
It should be pointed out that each time the script runs, the last backup file created, i.e "keyfiles-DATE.tgz" is renamed to "keyfiles-DATE.tgz.old" before the new file takes its place.
This is so that if you need to restore the backup file at anytime, my script knows which file to use by checking for a ".tgz" extension.
Because of this feature, I have also included a "--delold" option which deletes all the old backup files from the directory.
To use the program, type:
keyfiles --default
Which will start the backup process. If you want to surpress the verbosity, you can add the flag:
keyfiles --default --quiet
The other options that this program takes, are pretty much self-explanatory.
This backup script is by no means perfect, and there are better ones available. Any comments that you have, would be appreciated!!
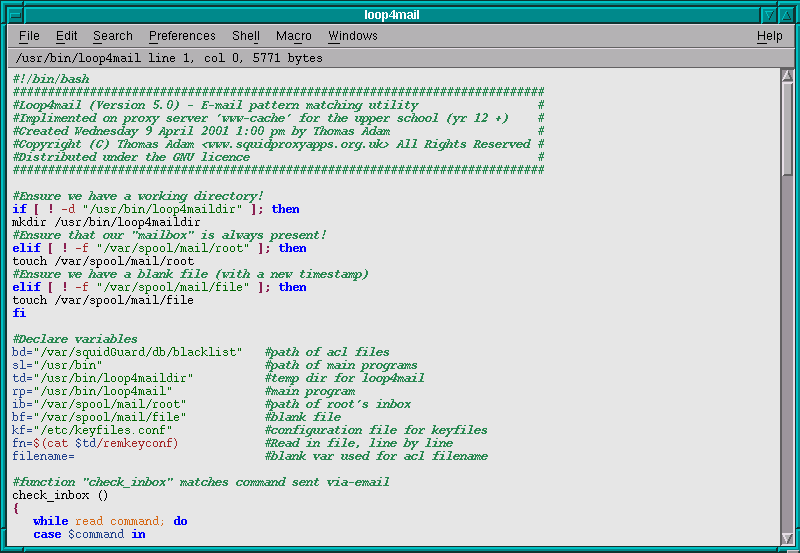
Way, way, back in the days when the illustrious founder of this special magazine, John Fisk was writing this column, another authour, Larry Ayers used to do a series of program reviews. He mentioned briefly a new program called Nedit, but never reviewed it.
So, I will :-)
I have been using Nedit for about three years now. I do all of my work in it -- when I am in X11 that is. A typical window of Nedit, looks like this screenshot.
This program offers a huge selection of features. Probably the most popular is the syntax highlighting feature, for over a host of languages, many of which are:
If, for some bizare reason, you program in an obscure langauge that is not listed in the above then you can specify your own regex patterns.
Nedit also allows you to do complex search and replace methods by using case-sensitive regex pattern matches.
A typical search / replace dialog box, looks like the following:

Allowing you to form complex searches.
Each of the menus, can be torn-off and remain sticky windows. This can be particularly useful, if you a particular menu over and over, and don't want to keep clicking on it each time.
This program is over-loaded with options, many of which I am sure are useful, but I have not been able to find a use for all of them yet. And as if that was not enough, Nedit allows you to write custom macros so that you can define even more weirder functions.
I recommend this program to everyone, and while I don't want to re-invent the Emacs / Vim argument, I really would consider it a viable alternative to the over-bloated "X11-Emacs" package that eats up far too much memory!! :-)
You can get Nedit from the following:
www.nedit.orgEnjoy it :-)
Well, that concludes it for this month -- I had not expected it to be quite this long!!. My academic year is more or less at a close, and I have exams coming up at the end of May. Then I shall be free over the summer to pursue all my Linux ideas that have been formulating in my brain ( -- that is whats left of it after Ben Okopnik brain washed me) :-)
Oh well, until next month -- take care.
 |
Send Your Comments | |
Any comments, suggestions, ideas, etc can be mailed to me by clicking the e-mail address link below:
mailto:thomas_adam16@yahoo.com
 Thomas Adam